Guide to Migrating Data from MySQL to Hive by utilizing Airflow’s Directed Acyclic Graph (DAG).
Introduction
Apache Airflow is a leading workflow management platform designed for orchestrating complex data engineering pipelines.
In this article, we demonstrate a practical implementation:
Migrating Data from MySQL to Hive with Apache Airflow.
Follow our step-by-step guide to seamlessly transfer data by leveraging Airflow’s MySqlToHiveOperator within a
Directed Acyclic Graph (DAG), ensuring an automated, scalable, and reliable migration process.
Scenario Overview: Migrating Data from MySQL to Hive
In this use case, we will migrate data from the employees table in the sampleDB database of MySQL to the companydb database in Hive.
A: Verify Source Data in MySQL
To confirm the data in the source table, execute the following query in the MySQL CLI:
mysql> select * from sampleDB.employees limit 2;
Output:
+------------+--------+------------+-----------------+----------+---------------+-------------------+-----------+
| first_name | gender | start_date | last_login_time | salary   | bonus_percent | senior_management | team      |
+------------+--------+------------+-----------------+----------+---------------+-------------------+-----------+
| Douglas    | Male   | 1993-08-06 | 12:42:00        | 97308.00 |         6.945 |                 1 | Marketing |
| Thomas     | Male   | 1996-03-31 | 06:53:00        | 61933.00 |         4.170 |                 1 |           |
+------------+--------+------------+-----------------+----------+---------------+-------------------+-----------+
2 rows in set (0.03 sec)
B: Prepare the Target Database in Hive
-
Create the companydb database in the Hive CLI:
0: jdbc:hive2://localhost:10000/> create database companydb;Output:
No rows affected (1.028 seconds) -
Verify existing tables in companydb:
0: jdbc:hive2://localhost:10000/> SHOW TABLES;Output:+-----------+ | tab_name | +-----------+ +-----------+(No tables exist in companydb at this stage.)
Step 1: Create the DAG File
Create a new Python file named export_mysql_to_hive.py in your Airflow DAGs folder (/airflow/dags/). You can use any text editor or IDE (e.g., nano, vim, PyCharm).
Step 2: Import Required Libraries
Include the necessary Python dependencies for the workflow:
import pendulum
from airflow import DAG
from airflow.providers.apache.hive.operators.hive import HiveOperator
from airflow.providers.apache.hive.transfers.mysql_to_hive import MySqlToHiveOperator
from datetime import timedelta
Step 3: Define Default Arguments
Set default configurations for the DAG, such as retries and ownership:
default_args = {
    'owner': 'data_engineering',
    'retries': 1,
    'retry_delay': timedelta(minutes=5),
}
Note: Additional arguments like email, email_on_failure, and depends_on_past are commented out but can be enabled as needed.
Step 4: Instantiate the DAG
Configure the DAG with a unique ID, schedule, and description:
dag_export_mysql_to_hive = DAG(
    dag_id='Export_mysql_to_hive',
    default_args=default_args,
    schedule='@once',  # Run manually or trigger once
    start_date=pendulum.yesterday('Asia/Dhaka'),  # Set your timezone.
    dagrun_timeout=timedelta(minutes=60),
    description='Transfer data from MySQL to Hive for employees table',
)
Step 5: Define the SQL Query for Data Extraction
Use a SQL query to extract and format the data from MySQL, delimiting fields with a tab (\t):
mysqlquery = """
SELECT CONCAT_WS('\t', first_name, gender, start_date, last_login_time, salary, bonus_percent, senior_management, team)
FROM  sampleDB.employees;
"""
Step 6: Set Up the Tasks
Task 1: Create the Hive Table
Define a HiveOperator task to create an external Hive table with the correct schema and delimiter:
create_hive_table = HiveOperator(
    task_id="create_hive_table",
    hql="""
    CREATE EXTERNAL TABLE IF NOT EXISTS companydb.employees (
        first_name STRING,
        gender STRING,
        start_date STRING,
        last_login_time STRING,
        salary DOUBLE,
        bonus_percent DOUBLE,
        senior_management INT,
        team STRING
    )
    ROW FORMAT DELIMITED
    FIELDS TERMINATED BY '\\t'
    STORED AS TEXTFILE;
    """,
    hive_cli_conn_id="hive_default",
    dag=dag_export_mysql_to_hive,
)
Task 2: Transfer Data from MySQL to Hive
Use the MySqlToHiveOperator to export data from MySQL to the Hive table:
export_mysql_to_hive = MySqlToHiveOperator(
    task_id='export_mysql_to_hive',
    sql=mysqlquery,
    hive_table='companydb.employees',
    create=False,  # Table is already created by the previous task
    recreate=False,  # Avoid dropping and recreating the table
    mysql_conn_id='mysql_default',  # Connection ID for MySQL
    hive_cli_conn_id='hive_default',  # Connection ID for Hive
    dag=dag_export_mysql_to_hive,
)
Step 7: Define Task Dependencies
Set the execution order of tasks using the bitshift operator (>>):
create_hive_table >> export_mysql_to_hive
This ensures the Hive table is created before data is exported from MySQL.
Final DAG Code
Combine all sections into the final export_mysql_to_hive.py file:
import pendulum
from airflow import DAG
from airflow.providers.apache.hive.operators.hive import HiveOperator
from airflow.providers.apache.hive.transfers.mysql_to_hive import MySqlToHiveOperator
from datetime import timedelta

default_args = {
    'owner': 'data_engineering',
    'retries': 1,
    'retry_delay': timedelta(minutes=5),
}

dag_export_mysql_to_hive = DAG(
    dag_id='Export_mysql_to_hive',
    default_args=default_args,
    schedule='@once',
    start_date=pendulum.yesterday('Asia/Dhaka'),
    dagrun_timeout=timedelta(minutes=60),
    description='Transfer data from MySQL to Hive for employees table',
)

mysqlquery = """
SELECT
    CONCAT_WS('\t', first_name, gender, start_date, last_login_time, salary, bonus_percent, senior_management, team)
FROM
    sampleDB.employees;
"""

create_hive_table = HiveOperator(
    task_id="create_hive_table",
    hql="""
    CREATE EXTERNAL TABLE IF NOT EXISTS companydb.employees (
        first_name STRING,
        gender STRING,
        start_date STRING,
        last_login_time STRING,
        salary DOUBLE,
        bonus_percent DOUBLE,
        senior_management INT,
        team STRING
    )
    ROW FORMAT DELIMITED
    FIELDS TERMINATED BY '\\t'
    STORED AS TEXTFILE;
    """,
    hive_cli_conn_id="hive_default",
    dag=dag_export_mysql_to_hive,
)

export_mysql_to_hive = MySqlToHiveOperator(
    task_id='export_mysql_to_hive',
    sql=mysqlquery,
    hive_table='companydb.employees',
    create=False,
    recreate=False,
    mysql_conn_id='mysql_default',
    hive_cli_conn_id='hive_default',
    dag=dag_export_mysql_to_hive,
)

create_hive_table >> export_mysql_to_hive
Step 8: Create Connections
Configure Airflow Connections for MySQl and Hive.
-
Go to the Airflow UI.
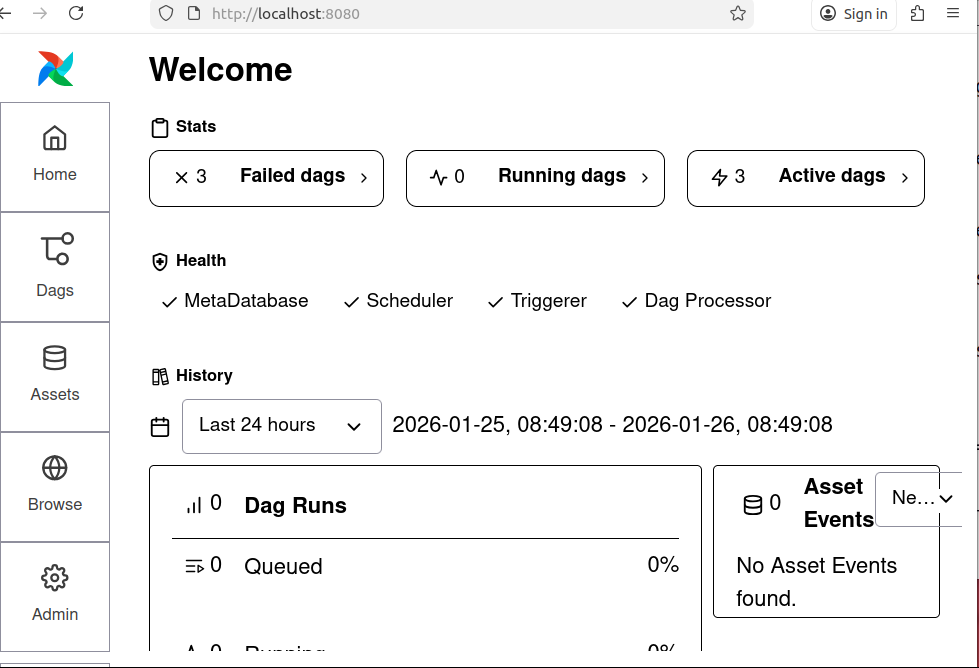
Figure: 1. Airflow UI -
Navigate to Admin > Connections > Add Connection
Connection 1: for MySQL:
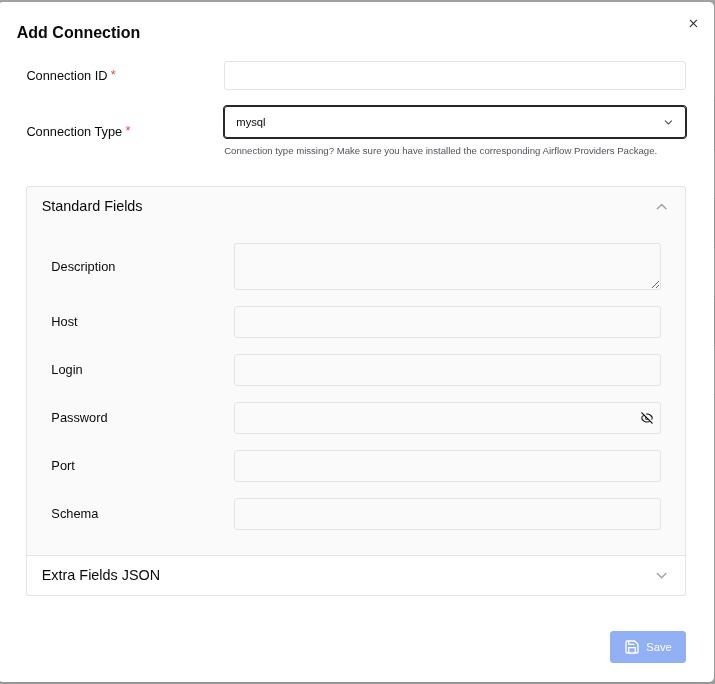
Figure: 2. Add Connection
To populate the Airflow MySQL connection form correctly, follow these steps based on Figure: 2. Add Connection:
- Connection ID: mysql_default
- Connection Type: mysql
Fill in the fields as follows:
- Description: (Optional) You can add a description like "Connection to MySQL for Airflow tasks."
-
Host: localhost
(If your MySQL server is running on the same machine as Airflow, use localhost. If it's on a different server, use the IP address or hostname of that server.) - Login: root
(User of mysql. If you use other user then use it.) -
Password:
(Use the password you set for the user in MySQL.) -
Port: 3306
(This is the default MySQL port. Change it if your MySQL server uses a different port.) - Schema: sampleDB (This is the default database schema Airflow will use for this connection. Replace sampleDB with the actual database name you want to connect to.)
Additional Fields (if available)
If there are additional fields like Extra, you can leave them empty unless you have specific
connection parameters to add (e.g., SSL settings, connection timeouts).
Save the Connection
After filling in the fields, click Save to store the connection in Airflow.
Connection 2: for Hive:
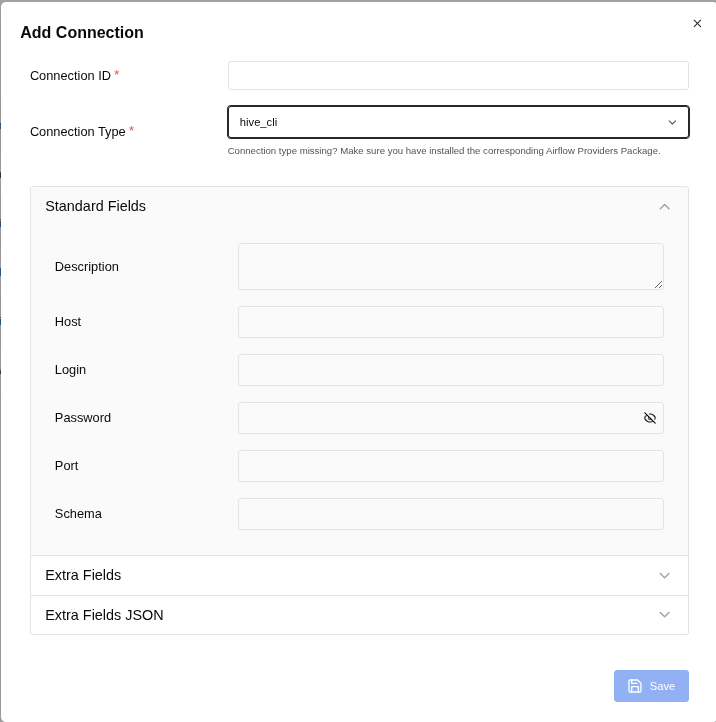
To fill in the fields for your Hive connection in Airflow, use the following details based on the image (Figure: 3. Add Connection) and typical Hive configurations:
- Connection ID: hive_default (This is the identifier for the connection in Airflow.)
- Connection Type: hive_cli (This specifies that the connection is for Hive CLI.)
Standard Fields
- Description: (Optional) You can add a description like "Connection to Hive for Airflow tasks."
- Host: localhost (If your Hive server is running on the same machine as Airflow, use localhost. If it's on a different server, use the IP address or hostname of that server.)
- Login: admin (This is the username for connecting to Hive.)
- Password: (Enter the password for the admin user.) (If there is no password, you can leave it blank, but it's recommended to set a password for security.)
- Port: 10000 (This is the default port for HiveServer2.)
- Schema: companydb (This is the default database schema Airflow will use for this connection. Replace it with the database name.)
Additional Configuration (if needed)
- If there are any additional parameters required for your Hive connection (e.g., SSL settings, additional configuration parameters), you can add them in the Extra field (usually in JSON format).
Now we can see connections as following:
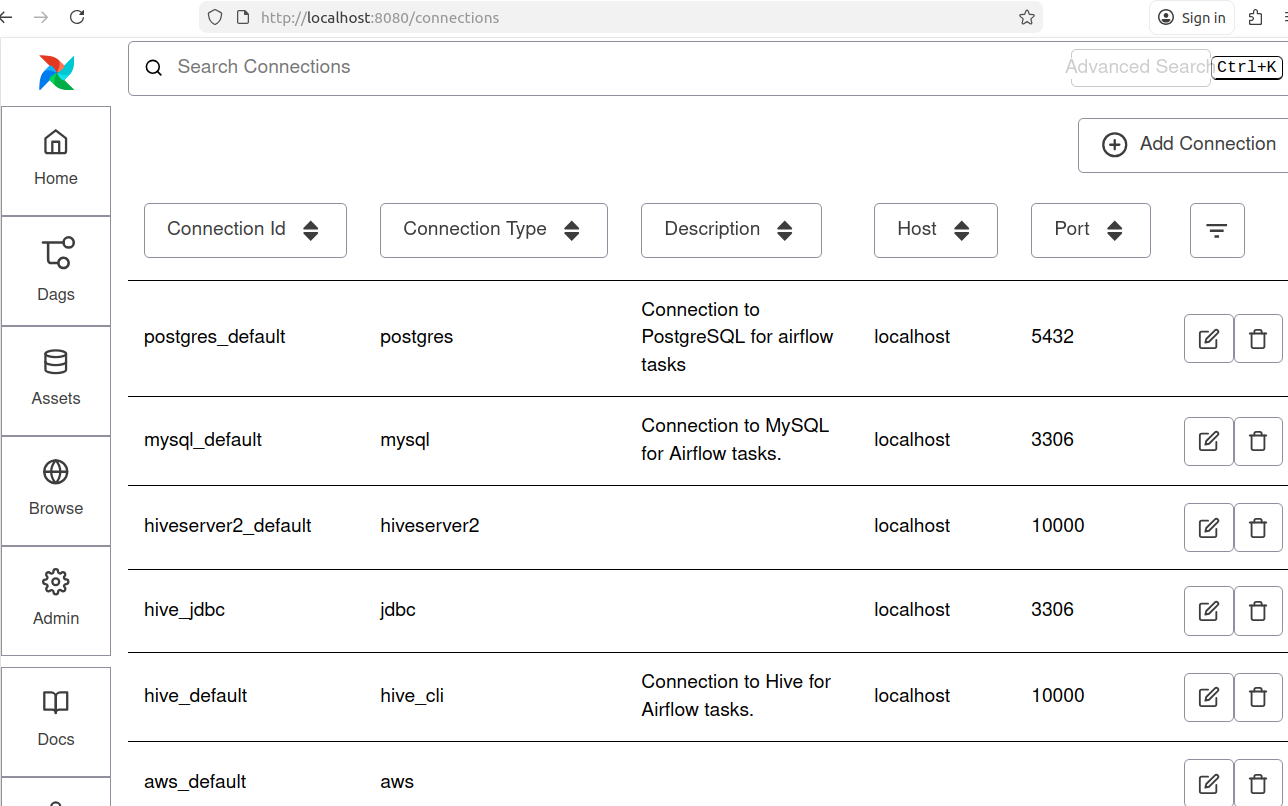
Note: For this project Connection Id for MySQl: mysql_default and Connection Id for Hive: hive_default are shown in the Figure: 4.
Step 9: Verify the task
On the screen, you can observe the Task ID "Export_mysql_to_hive" within the Airflow Directed Acyclic Graph (DAG) in its idle state, indicating that the task has not yet been executed.
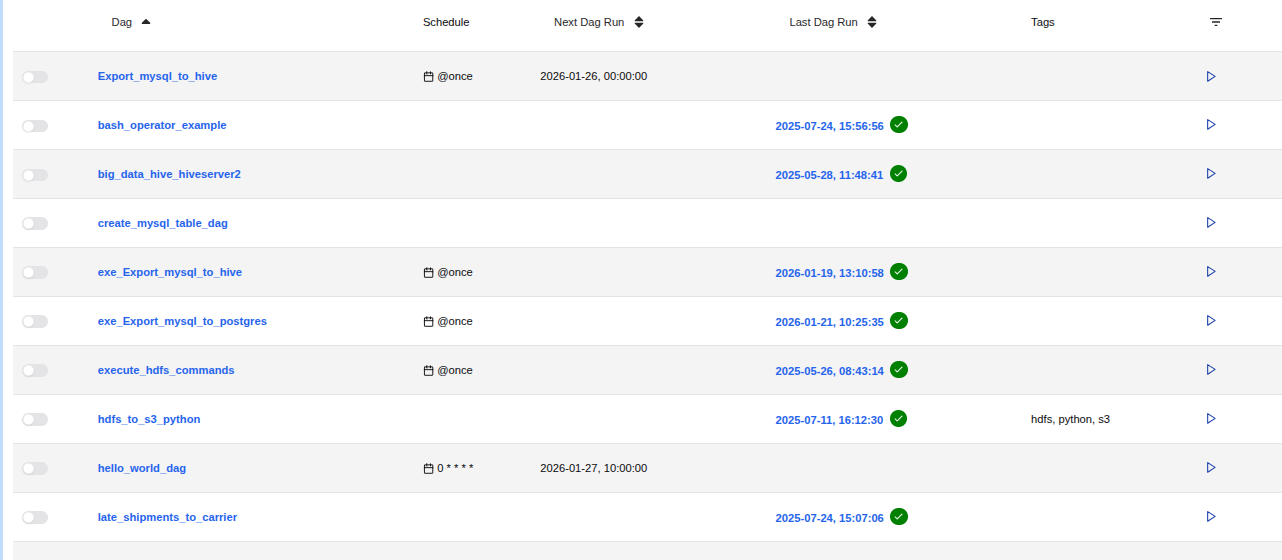
Note: Top most of Figure: 5.
Step 10: Execute the DAG
To start the execution of the DAG, follow these steps:
-
Ensure Hadoop Daemons are Running:
Make sure all Hadoop daemons are up and running before you proceed. -
Trigger the DAG:
- Locate the DAG ID "Export_mysql_to_hive" in the Airflow web interface.
- Click the "Trigger DAG" button, indicated by an arrowhead (>), located at the right corner of the topmost row of the screen (refer to Figure 5).
-
Wait for Completion:
Allow the process to complete. You will see the progress in the Airflow interface.
Figure: 6. Export_mysql_to_hive in its executed state -
Verify Successful Completion:
- Once the process is successfully completed, a white checkmark within a green circle will appear on the right side of the datetime at the topmost row of the screen (refer to Figure 6).
By following these steps, you ensure that the DAG is executed correctly and monitor its successful completion.
Step 11: Verify Data Transfer to Hive.
To confirm that the employees table data has been successfully transferred from MySQL to the Hive database companydb, follow these steps:
-
Access Hive:
Open your Hive interface (e.g., Beeline or Hive CLI). -
Switch to the companydb Database:
0: jdbc:hive2://localhost:10000/>USE companydb; -
Check the employees Table:
0: jdbc:hive2://localhost:10000/> SHOW TABLES;Output:+-----------+ | tab_name | +-----------+ | employees | +-----------+ 1 row selected (0.059 seconds)Ensure that the employees table is listed. -
Preview the Data:
0: jdbc:hive2://localhost:10000/>SELECT * FROM employees LIMIT 5;Output:+-----------------------+-------------------+-----------------------+----------------------------+-------------------+--------------------------+------------------------------+------------------+ | employees.first_name | employees.gender | employees.start_date | employees.last_login_time | employees.salary | employees.bonus_percent | employees.senior_management | employees.team | +-----------------------+-------------------+-----------------------+----------------------------+-------------------+--------------------------+------------------------------+------------------+ | Douglas | Male | 1993-08-06 | 12:42:00 | 97308.0 | 6.945 | 1 | Marketing | | Thomas | Male | 1996-03-31 | 06:53:00 | 61933.0 | 4.17 | 1 | | | Maria | Female | 1993-04-23 | 11:17:00 | 130590.0 | 11.858 | 0 | Finance | | Jerry | Male | 2005-03-04 | 13:00:00 | 138705.0 | 9.34 | 1 | Finance | | Larry | Male | 1998-01-24 | 16:47:00 | 101004.0 | 1.389 | 1 | Client Services | +-----------------------+-------------------+-----------------------+----------------------------+-------------------+--------------------------+------------------------------+------------------+ 5 rows selected (2.195 seconds)Verify that the data matches the records from your MySQL employees table.
By performing these checks, you can confirm that the data has been correctly dumped from MySQL to Hive.
Conclusion
In this guide, we explored the process of migrating data from MySQL to Hive using Apache Airflow. By leveraging Airflow's powerful workflow automation capabilities, we successfully set up a pipeline to seamlessly transfer and transform data between these two systems. This approach ensures data consistency, reliability, and efficiency in handling large datasets.
Image:freepik