Export and Import Data between Hadoop Cluster and SQL Server using SQL Server Integration Services(SSIS)
Introduction
In the digital age, businesses are flooded with data—and the pace is only accelerating. To keep up with market changes,make smarter decisions, and drive growth, organizations need to analyze data from multiple sources effectively. But how do you capture, move, and store these massive datasets in relationaldatabases without bottlenecks?
Enter Apache Hadoop, a powerhouse for big data processing and storage. Its HDFS (Hadoop Distributed File System) is designed to handle petabytes of data across distributed environments. In this article, we’ll show you how to migrate large-scale data between Microsoft SQL Server and HDFS using SSIS, bridging the gap between traditional databases and modern big data solutions.
In this guide, you’ll discover how to seamlessly transfer data from Microsoft SQL Server Database to HDFS
using SSIS (SQL Server Integration Services).
Now we check both Hadoop Web Interface and Linux Environment.
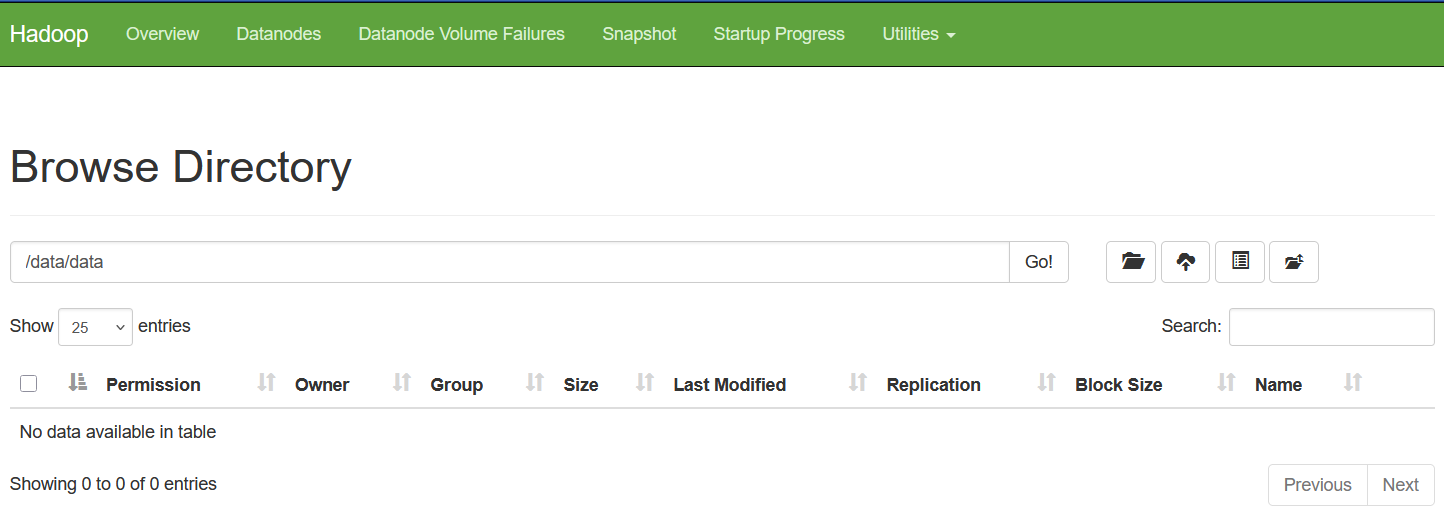
Figure: 1-Hadoop Web Interface

Figure: 2-Linux
Clearly we see there is no data file in the hdfs folder /data/data
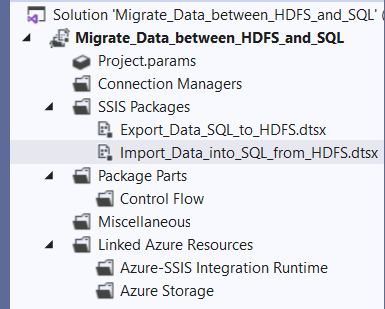
1. Create a Project
Create a new project in Visual Studio. The name of our project is Migrate_Data_between_HDFS_and_SQL. For creating project in details follow my project Import and Export Excel data into SQL Server using SQL Server Integration Services(SSIS)
SSIS packages enable efficient data exchange between HDFS and SQL Server using these two methods:
- Exporting: Extract data from SQL Server and save it in HDFS.
- Importing: Transfer data from HDFS into SQL Server tables.
A. Exporting: Extract data from SQL Server and save it in HDFS.
2. Create SQL Server Connection
For creating SQL Server Connection in details follow my project Import and Export Excel data into SQL Server
using SQL Server Integration Services(SSIS)
3. Create a Data Flow Task
With the Data Flow Task, you can effortlessly transfer data from one place to another—whether it’s from databases,
files, or other sources—and transform it along the way to meet your requirements.
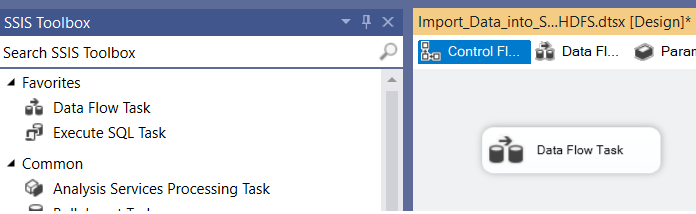
Drag the data flow task from the SSIS toolbox to Control Flow and double-click it to go to Data Flow.
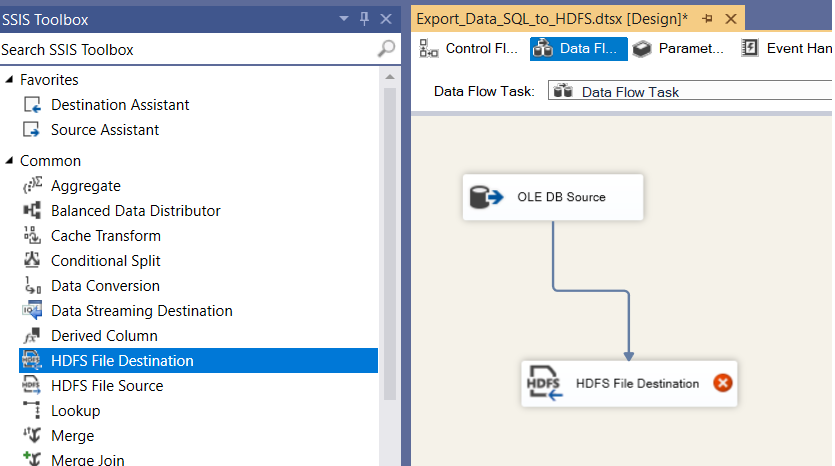
Figure: 3-SSIS Toolbox and Data Flow Task
Now we drag and drop OLE DB Source into Data Flow Task and connect it to the SalesOrderDetail table in the SampleDB database. Again we drag and drop HDFS File Destination tool, double-clicking on it to go HDFS File Destination Editor dialogbox.
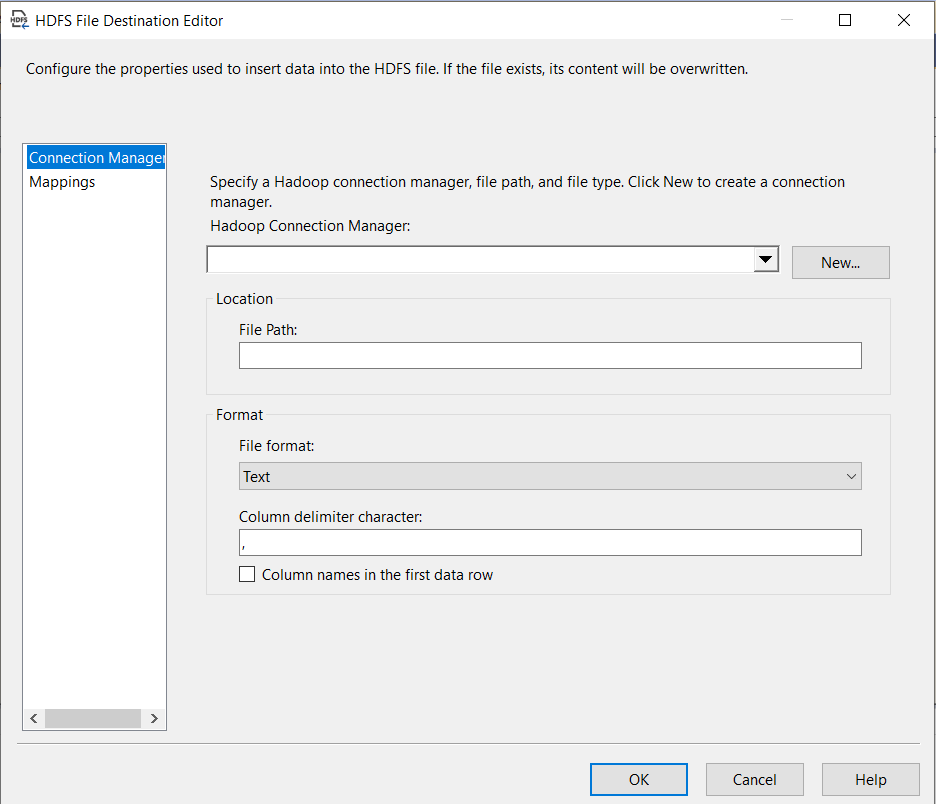
Figure: 4-HDFS File Destination Editor
Upon clicking the 'New...' button, the following dialog box appears.
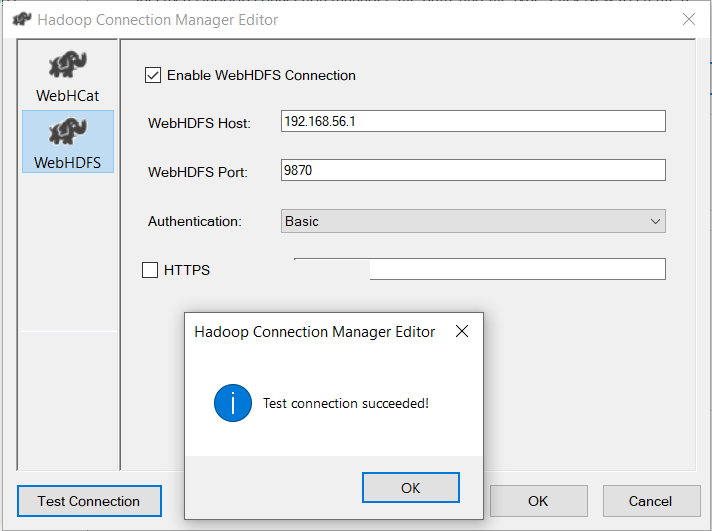
Figure: 5-Hadoop Connection Manager Editor
In this dialog box, select WebHDFS as the connection type, populate all required input fields, and click the Test Connection button to verify the configuration, as demonstrated in Figure: 5 and click OK.
Configure the HDFS File Destination Editor (Figure 4) with the following settings:
- File Path: /data/data/SalesOrder.txt
- File Format: Text (selected from the available options: Text, Avro, or ORC)
- Column Delimiter: , (comma)
- Options: Check the box for "Column names in the first data row."
Finally, click OK to complete the process.
4. Execution of Package
To ensure the data export process is successful:
Execute the SSIS package and wait for completion.
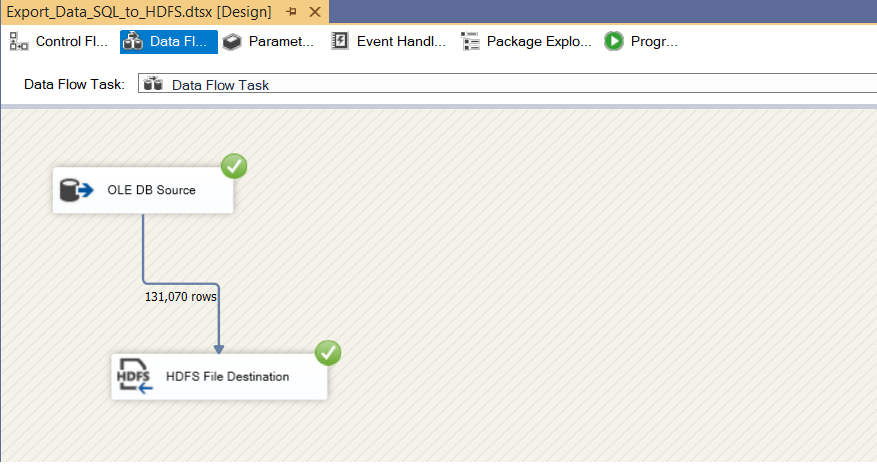
Figure: 6-Executed Data Dlow
Once the SSIS package execution completes successfully, you can verify the successful export of data by checking both the Hadoop Web Interface and the Linux environment.
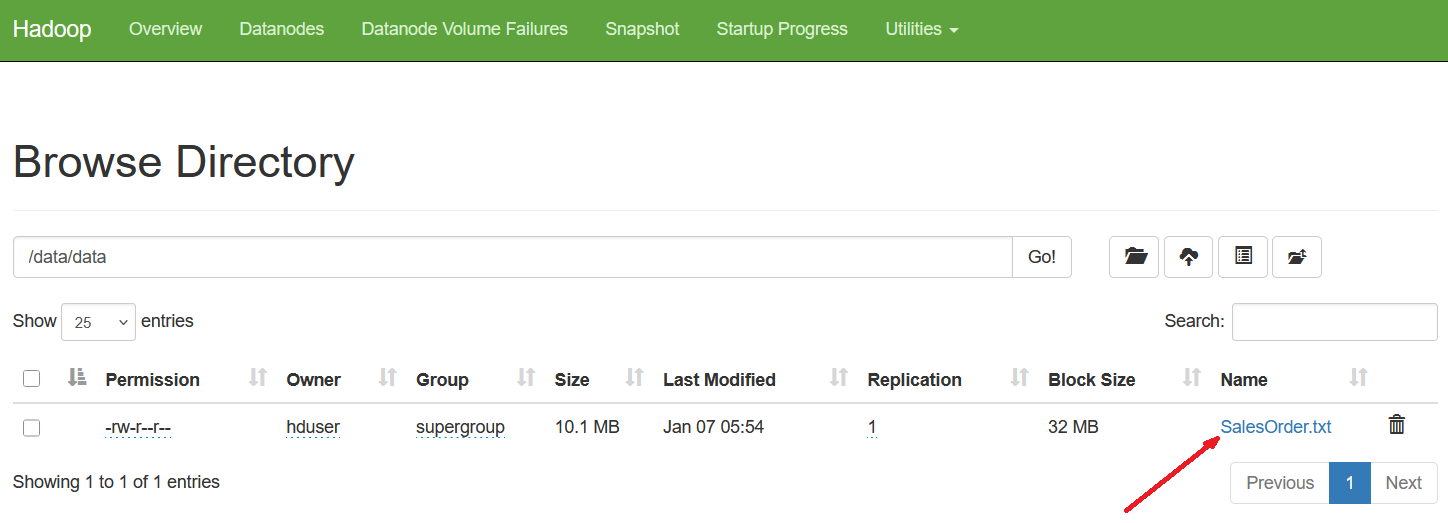
Figure: 7-Data import verified using the Hadoop Web Interface.
Also, the text file is exported successfully into the Linux Environment.
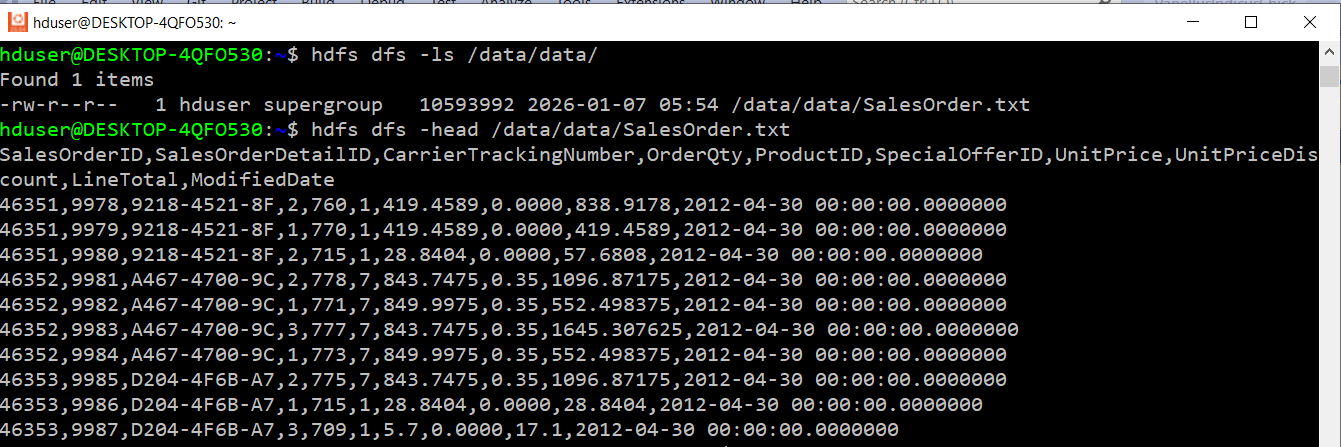
Figure: 8-File exported successfully into Linux.
B. Importing: Transfer data from HDFS into SQL Server tables.
Next, we load data from the SalesOrder.txt file (stored in HDFS) into the SalesOrder table
within the SampleDB SQL Server database.
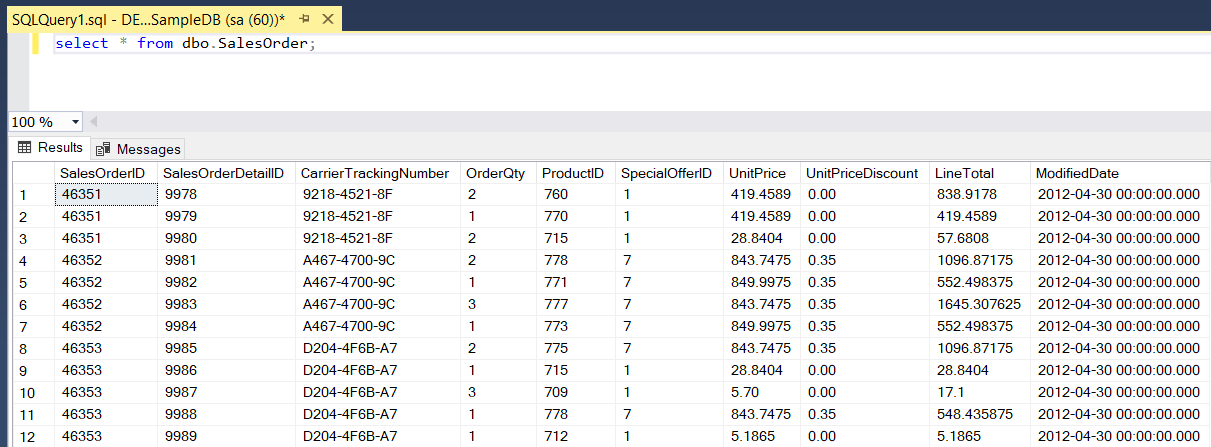
SalesOrder
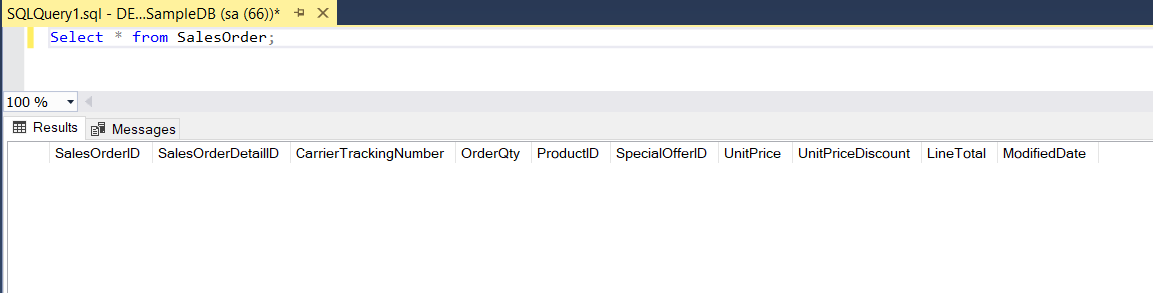
Figure: 9-SalesOrder table
1. Create a New Package:
- In Solution Explorer, navigate to SSIS Packages.
- Right-Click and select New SSIS Package from pop-up menu.
- Rename the default package name from Package1.dtsx to Import_Data_into_SQL_from_HDFS.dtsx for clarity.
2. Add a Data Flow Task:
- From the SSIS Toolbox drag and drop the Data Flow Task onto the Control Flow tab.
- Double-click the Data Flow Task to switch to the Data Flow tab.
3. Configure the Data Flow:
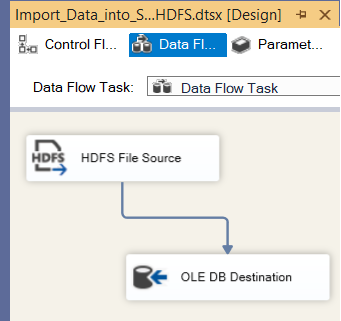
- Drag and drop the HDFS File Source component onto the Data Flow tab.
- Drag and drop the OLE DB Destination component onto the Data Flow tab as well.
4. Configure the HDFS File Source:
- Set up the HDFS File Source component following the same configuration steps as the HDFS File Destination (refer to the A. Exporting section for detailed guidance).
- Ensure all settings match the configurations shown in Figure 3, Figure 4, and Figure 5.
5. Configure the OLE DB Destination:
- Configure the OLE DB Destination component based on the settings used in our project, "Import and Export Excel Data Into SQL Server using SSIS".
- Map the destination to the SalesOrder table in the SampleDB database.
6. Verify the Configuration:
- Once both components are properly configured, your setup should resemble the examples provided in the figures.
7. Execution of The Package.
- In Solution Explorer, navigate to Import_Data_into_SQL_from_HDFS.dtsx.
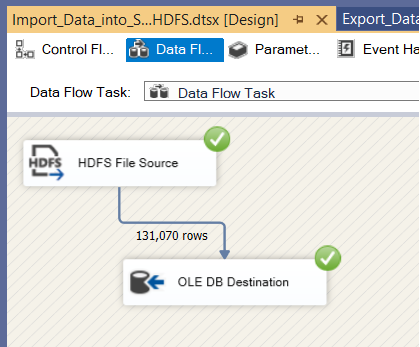
- Right-click and select Execute Pacakage from the pop-up menu and wait for process completion.
- After running the SSIS package execution completes successfully, the Data Flow looks like the provided figure.
8. Verify the results
- Once finished executing of the package, the SalesOrder table in the database is populated with HDFS data.
Conclusion
In this article, we discover how to leverage SSIS Hadoop components at the data flow
level to effortlessly move data in and out of our on-premise Hadoop cluster.
This article provides a step-by-step walkthrough for importing and exporting data with ease.

Image:freepik